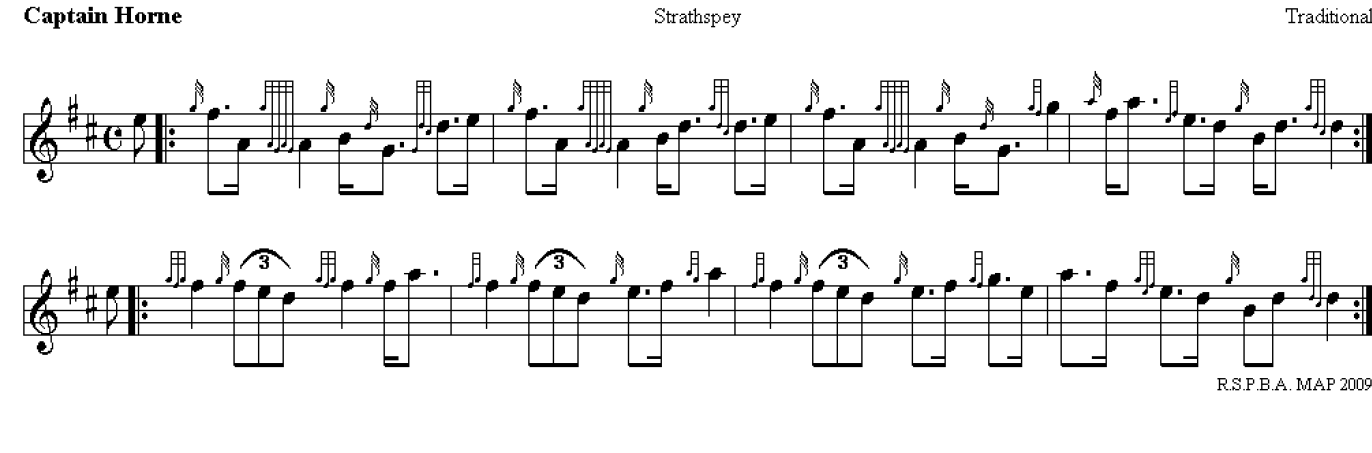
Five discussion points
1
First high G gracenote bar 1 - this takes up a quarter of the
16th note preceding it (low A). To maintain the heavy weak medium weak
beat pattern in strathspeys it is essential to soften the gracing
which leads on to the second beat of the bar.
2 Tachum
bar 1 - the high G gracenote fits into one third of the preceding 16th
note, giving the effect of being a big gracenote. This helps create
rhythmical balance and shape in the tune.
3 Throw bar 1
- the D and the C strike are the same length as each other. This is a
common trick in strathspey playing as it makes the throw seem heavier
without altering the low G (which as in this case isn't really
avaialble for alteration).
4 Hara bar 2 - the strike comes up
on the beat. Alternatives are possible but this choice has been made
for this interpretation, and for playing together. Also, drummers have
a variety of options which will match onto this well.
5 High
G doubling bar 3 - as with the throw in bar 1, the G and F are the same
length as each other to give a little extra emphasis. Listen carefully
to the midi files.
Videos to play along with - exercises below